A bicycle transmission is a set of components for bicycles that together serve to transfer the muscles of the rider to the rear wheel of the bicycle to ride. It’s thanks to the transmission that the bike rides when you pedal.
Bike chain
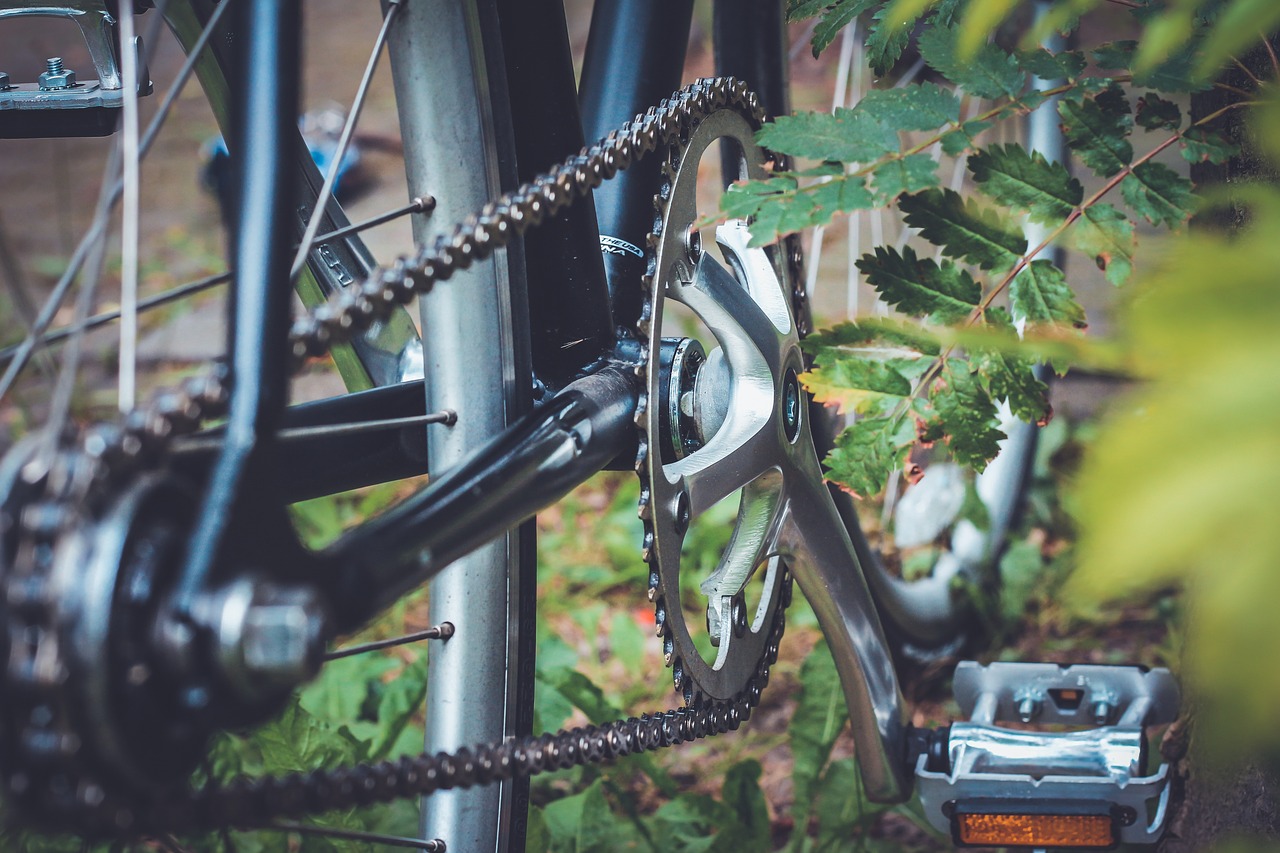
The chain is part of the ride bike, which transmits energy from the pedals, through connecting rods and stars to the rear wheel. The chain consists of links that can be connected to each other with a pin or lock. Chains can be of different widths and have larger or smaller spacing between knots (backs).
It is thanks to the chain that the whole transmission of the bicycle works as a whole.
An important element in the operation of your bicycle is the chain, the life of which depends on timely maintenance. It should not crack or squeak during operation. It is normal for the chain to gradually wear out during use and thus lengthen. If adjusted correctly, the chain should sag by 10-12 mm. When pulled back with your fingers, it should be 10-15 mm, and if this value is greater, it should be tightened. Note that this is only valid for bicycles, either without shifters or with planetary gears.
When installing a new chain, it is also important to adjust its tension. Even more importantly, after the first three races, tighten it up. The new part stretches very quickly during the first operation.
Adjustment of tension on the bike without gears
A correctly stretched chain on a bike without speeds should be slightly loose by about 5 mm of sag.
To tension the chain on a normal speedless bike, you need to be able to pull it on:
- Put your transport up on the wheels.
- Loosen the nuts or eccentric fixings on the rear wheel.
- Adjust the correct amount of chain slack by moving the wheel along sloping grooves called dropouts.
The rear wheel should only be mounted in the position where its axle is parallel to the carriage shaft.
If the chain is too tight, it becomes very difficult to turn the pedals on the bicycle and the chain gear parts wear out quickly. A sagged chain can jump off the sprockets and it will not be possible to continue riding.
If the wheel is already stuck on the edge of the dropouts, there is nowhere else to move it, and the chain belt is still hanging, then a couple of links will need to be removed.
Adjustment on a bike at speeds…
The chain tension of a bicycle with a rear parallelogram switch is set entirely by the spring force of the switch itself. But if the chain is too long, this tensioner will not be able to compensate for its sag, and it will hit the frame. This is especially true for bikes with short rear shifter.
A chain that’s too short makes it difficult to change gears. It will cause accelerated wear and tear on the gear parts. This is particularly true for twin overhead bikes.
Very often, when installing a new chain on a high-speed bike, it is necessary to shorten its length, i.e. remove several links.
There are two ways to determine how many links need to be removed:
- Install the chain on the largest sprockets in the front and rear. Pull it out by pushing the rear derailleur to the front limit. Now all you have to do is add two links, and the optimum length will be determined.
- Move the chain from the front to the largest sprocket and the chain from the rear to the smallest sprocket. Tighten the chain to a position where the rear derailleur’s frame will point exactly downwards, more precisely when the derailleur rollers’ axles are in the same vertical line.
On two hangers, the chain length will be adjusted more correctly by pressing the rear pendulum to a position where the front sprocket cassette is as far away from the rear ratchet as possible. By marking the correct length, extra links can be removed.
Removal of the links
On a regular bike without speed, they have a detachable chain and a lock on one of the links. Most modern speed bikes are equipped with chains that are equally well riveted on all links. To disassemble a solid riveted chain is not difficult, just sharpen on emery pin heads on one of its links. It is even easier and more accurate to disassemble the rivets with a special tool – squeezing.
It should be noted that the squeezing is a universal tool. It not only allows you to squeeze out the locking pin, but also to re-tape the disassembled chain. Many pushes have two working grooves: one for squeezing the pin out of the roller and the other for pressing. The setting place, located further away from the pressure screw, is designed to rivet the chain pins.
Chain slippage
The chain starts slipping when the tension is relieved due to its strong stretching. And when it is too stretched, it wears out the sprockets quickly. So by putting a new chain on an old ratchet, nothing can be achieved. Still, the slippage on the little sprockets will remain.
If this isn’t the first time you’ve pulled up an old chain, get ready for an emergency replacement. Remember, you can only remove two links from it once. At the end of the day, you’ll still have to spend on a new part.